Cleaning and Packing Soccer Tennis Gear After Use
Want your soccer tennis gear to last longer and perform better? Proper cleaning, drying, and storage are key. Neglecting these steps can lead to mold, bad odors, or early wear and tear. Here’s what you need to know:
- Why It Matters: Clean gear prevents damage, stays functional, and avoids unpleasant smells.
- Essential Cleaning Supplies: Use mild detergent, soft brushes, microfiber cloths, and white vinegar for odors.
-
Step-by-Step Care:
- Clean nets, balls, and bags separately with gentle methods.
- Dry everything thoroughly to avoid mold.
- Inspect for damage like tears or punctures.
-
Packing & Storage:
- Roll or fold nets carefully to prevent tangling.
- Store in a cool, dry place to avoid heat and humidity damage.
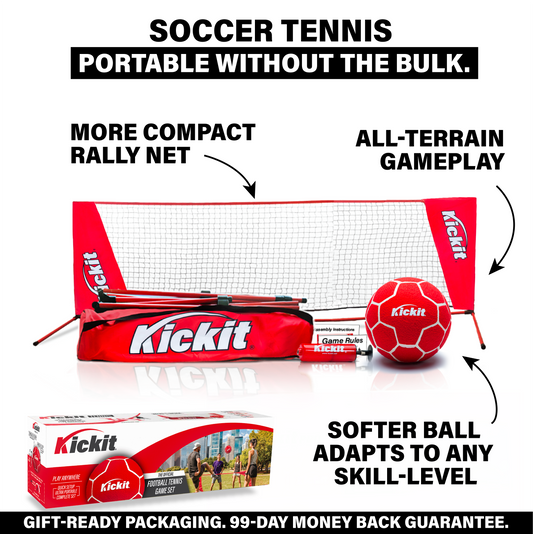
Pro Tip: Kickit soccer tennis sets make maintenance easier with lightweight, easy-to-clean materials and compact storage options.
Follow these steps to keep your gear game-ready and in great condition.
How to properly clean summer sports gear
Cleaning Supplies and Getting Ready
Before diving into cleaning your soccer tennis gear, having the right supplies on hand can make the whole process smoother and more effective. Using appropriate products not only extends the life of your gear but also ensures a thorough clean. Getting organized beforehand will save you time and help you avoid missing any steps.
What You Need for Cleaning
Start with a mild liquid detergent - one that’s free of bleach or fabric softeners. These harsh chemicals can weaken synthetic materials often found in soccer tennis nets and balls. A gentle dish soap or a detergent designed specifically for sports gear is ideal.
You’ll also need soft brushes in various sizes. A toothbrush works wonders for cleaning tight spots like net connections and ball seams, while a larger soft brush is perfect for broader surfaces. Avoid stiff-bristled brushes, as they can damage delicate fabrics or mesh.
Microfiber cloths are a must-have. They’re great for wiping down surfaces without scratching, and they absorb moisture more effectively than standard towels. Plus, they won’t leave behind annoying lint. Keep a few on hand to avoid cross-contamination between dirty and clean areas.
For machine-washable items with buckles, straps, or Velcro closures, grab a mesh laundry bag or even a clean pillowcase. This protects both your gear and your washing machine during the wash cycle.
Don’t forget white vinegar. It’s fantastic for tackling tough odors and offers mild disinfection. Just avoid mixing it with baking soda during cleaning - it creates foam that can leave behind a sticky residue.
Lastly, prepare clean water, a large basin or sink for soaking, and clean towels for drying. Once you’ve gathered everything, it’s time to prep your gear for cleaning.
Getting Your Gear Ready to Clean
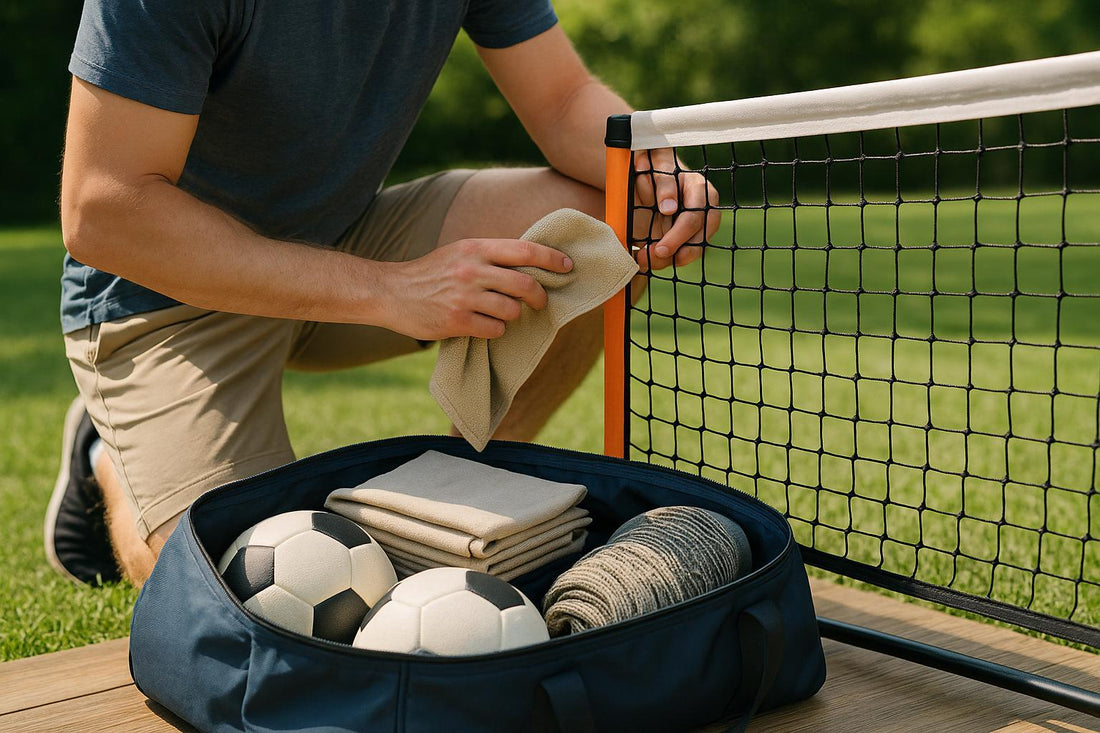
With your supplies ready, it’s time to prepare your gear for a proper clean. Start by emptying your gear bag completely. Shake out any loose dirt, sand, or debris, and check all pockets and compartments. This step prevents dirt from embedding into your equipment during the cleaning process.
Sort your items based on how dirty they are and the cleaning method they require. Heavily soiled items, like muddy nets or balls, should be cleaned first to avoid contaminating other gear. Group similar materials together - nets with nets, balls with balls, and fabric items with fabric items.
Air out damp gear in a well-ventilated area, away from direct sunlight. This helps prevent mold or mildew from forming while you prep your cleaning supplies.
Take a moment to inspect your gear for any tears or worn spots. Make a mental note of these areas so you can clean them carefully and avoid further damage. Catching small issues early can save you from dealing with bigger repairs later.
Finally, detach any clips, carabiners, or adjustable straps. These pieces often require different cleaning methods than the main fabric or mesh components. Cleaning them separately also reduces the risk of snagging or damaging other parts of your gear during the process.
How to Clean Each Part of Your Gear
Now that you’ve gathered your cleaning supplies and prepped your gear, it’s time to get down to business. Each piece of soccer tennis equipment requires a specific cleaning method to keep it in great shape without risking damage. Proper maintenance ensures your gear stays in top condition for every match.
Cleaning Soccer Tennis Nets
Soccer tennis nets endure a lot during play, collecting dirt, grass stains, and debris in their mesh. Start by laying the net flat on a clean surface or hanging it securely between two sturdy points for easy access to all sections.
Fill a basin with lukewarm water and mix in a small amount of mild detergent. Work in small sections to avoid overstretching or tearing the net. Dip a soft-bristled brush into the soapy water and gently scrub, focusing on areas with visible dirt buildup.
Pay extra attention to the headband and reinforced edges, as these spots often bear the brunt of wear and tear. Use gentle, circular motions to clean these areas without weakening the fibers. For stubborn stains, let the soapy water sit on the spot for a few minutes before scrubbing lightly - don’t overdo it, as aggressive cleaning can damage the material.
Rinse each section thoroughly with clean water to remove all soap residue. A gentle spray from a garden hose works well if you’re outdoors. Soap left behind can attract more dirt, so don’t skip this step.
To prevent mold or mildew, let the net air-dry completely before packing it away. Regular cleaning - about once a month if used frequently - helps extend the life of your net and keeps it in peak condition.
Once the net is clean, it’s time to give your soccer tennis balls the care they deserve.
Cleaning Soccer Tennis Balls
Soccer tennis balls are designed to be lighter and more responsive than standard soccer balls, so they require a delicate touch. Start by using a damp microfiber cloth with a small amount of mild soap.
Gently wipe the surface of the ball using circular motions. Pay close attention to the seams, where dirt tends to gather. A soft toothbrush can help you clean these areas, but be careful not to apply too much pressure.
For scuff marks or stubborn grime, avoid scrubbing too hard, as this could damage the ball’s surface or affect its bounce. Instead, let the soapy cloth rest on the stain for a minute or two, then wipe it away gently.
Never soak soccer tennis balls or toss them in the washing machine. Excess moisture can seep into the ball’s interior, altering its weight and responsiveness. It can also cause the outer layer to separate from the core.
After cleaning, wipe the ball with a clean, damp cloth to remove any soap residue. Dry it immediately with a towel, then allow it to air-dry for at least 30 minutes before storing it. This ensures no moisture lingers in the seams.
With your balls clean, the final step is to freshen up your carrying bag.
Cleaning the Carrying Bag
Your carrying bag plays a crucial role in protecting your gear, but it can also trap sweat, dirt, and odors over time. Regular cleaning helps prevent bacteria buildup and keeps your equipment smelling fresh.
Check the care label first to see if the bag is machine washable. Many modern bags can handle a gentle machine wash, but some require hand cleaning.
For machine-washable bags, place the bag in a mesh laundry bag or pillowcase to protect zippers and straps. Use cold water, a gentle cycle, and mild detergent. Remove the bag as soon as the cycle finishes to avoid wrinkles or damage.
If hand washing is required, fill a large basin with lukewarm water and detergent. Use a soft brush to clean heavily soiled areas, focusing on the main compartment and drink holders, which often trap sweat and moisture. For stubborn odors, add a cup of white vinegar to the rinse water to neutralize bacteria. Just be sure to rinse thoroughly afterward to remove any vinegar smell.
Turn pockets inside out to clean them, and wipe down zippers and buckles with a damp cloth. Dry these areas immediately to prevent rust or corrosion.
After washing, reshape the bag while it’s damp and let it air-dry in a well-ventilated spot. Avoid direct sunlight, as it can fade colors or weaken materials. Ensure all compartments are completely dry before storing your clean gear.
Drying and Checking Your Gear
After cleaning your soccer tennis gear, drying and inspecting it properly is a must. Skipping these steps can lead to mold, bad smells, or even equipment failure when you least expect it. Taking a little extra time now can save you from bigger headaches later.
How to Air Dry Equipment
Never store gear while it’s wet or even slightly damp. Moisture trapped in seams or dense materials creates the perfect environment for bacteria and mold to thrive. Even if your gear feels dry to the touch, it’s worth double-checking.
Start by choosing a spot with good airflow but no direct sunlight. While sunlight or heat might seem like a quick fix, they can actually damage your equipment. High temperatures can weaken synthetic materials, fade colors, or make nets brittle. A shaded outdoor area, a garage with open doors, or a covered patio works well.
For soccer tennis nets, hang them fully stretched out between two sturdy points like fence posts or trees. This ensures that air can circulate freely through the mesh. If hanging isn’t an option, drape the net over chairs or a clothesline, but avoid bunching it up - trapped moisture can lead to trouble.
Dry soccer tennis balls by placing them on a towel with some space between each ball. Rotate them every 30 minutes for the first couple of hours to help the seams dry thoroughly, as these areas are most prone to retaining moisture.
For carrying bags, open all compartments and turn the bag inside out if possible. This maximizes airflow. If the air feels stagnant, set up a small fan nearby to speed up the process and prevent any musty odors.
Plan for 2-4 hours of drying time, depending on the weather. Humidity and temperature play a big role, so adjust accordingly. Once everything is completely dry, you’re ready to move on to the inspection phase.
Checking for Damage
Once your gear is dry, it’s time to give it a thorough check. Catching wear and tear early can save you from unexpected failures during a game and help you decide whether repairs or replacements are necessary.
Start with the soccer tennis balls, as they take the most abuse. Look for cracks, punctures, scuffs, or loose stitching on the panels. Sometimes, small punctures are easier to feel than to see, so run your hands over the surface to detect any damage.
Roll each ball slowly on a flat surface to check for shape irregularities. If the ball wobbles or doesn’t roll smoothly, it may have a flat spot or internal damage. Give each ball a firm squeeze and a few bounces to test for consistency. A well-maintained ball should feel firm and bounce predictably.
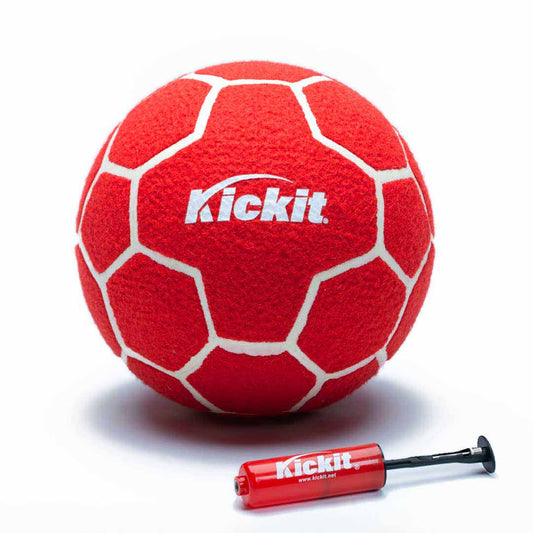
Use an air pressure gauge to make sure the ball is properly inflated. Most soccer tennis balls require 8-12 PSI, but always check the manufacturer’s guidelines for your specific ball. If a ball deflates faster than usual, it may have a slow leak that could be fixed with a repair kit.
Next, inspect the net for structural issues. Look closely at the mesh for tears, holes, or loose weaving. Pay extra attention to the headband and corner reinforcements, as these areas handle the most stress during play. While small mesh tears can often be patched up, damage to reinforced areas typically means it’s time for a replacement.
Don’t forget about your carrying bag. Test all zippers by opening and closing them a few times. If they stick or catch, it’s a sign of wear. Check the stitching, particularly around handles and straps, as these areas bear the most weight. Look for signs of material separating, peeling, or losing shape.
Document any issues you find by snapping photos. This helps you monitor whether problems worsen over time and can be useful if you need to contact customer service or order replacement parts.
For minor damage, like loose stitching on a ball or a small tear in the net, DIY repairs can be a quick fix. Use heavy-duty thread and a thick needle for stitching, but if the damage is extensive, replacing the item is often the smarter choice. Sometimes, the cost and effort of repairs outweigh the benefits.
Set a replacement schedule based on how often you use your gear. Items used multiple times a week will wear out faster than those used occasionally. Keep a record of when you bought each piece and any repairs you’ve made. This will help you decide when it’s time to invest in new equipment rather than continuing to patch up old gear.
sbb-itb-8dc5da3
Packing and Storage Tips
Once your gear is clean and inspected, proper packing and storage are key to keeping it in top shape and ready for your next game. How you handle your equipment now can make a big difference in its lifespan and how quickly you can set up next time.
Folding and Packing Nets
Start by laying the net flat on a clean surface. Roll the net carefully when it's not in use to avoid tangling. Begin rolling from one end, keeping it taut but not overly stretched, and smooth out any wrinkles or bunches as you go. Handle the net gently to minimize wear and tear during packing and transport.
If space is tight, folding the net is a good alternative. Fold it gently to avoid sharp creases, which can weaken the material over time. Once folded or rolled, place the net into a protective bag. This keeps dust at bay and prevents the mesh from snagging on other items. Always make sure the net is completely dry before storing it - this helps prevent mold and mildew from forming.
After securing the net, take a moment to organize the rest of your gear to keep everything in order.
Organizing Items in Your Bag
Divide your carrying bag into sections for different types of equipment. For instance, keep soccer tennis balls in one compartment and nets in another to prevent the mesh from stretching or tearing. If any items are slightly damp or still have stains, store them in separate waterproof bags to avoid spreading moisture or dirt. Heavier items like balls should go at the bottom of the bag, while more delicate gear can be placed on top with extra padding, such as a towel, for protection.
Consider packing a small cleaning kit, including essentials like a microfiber cloth, a brush, and travel detergent, for quick cleanups after play. Labeling compartments or using clear storage pouches can make it easier to find what you need in a hurry.
Once everything is packed, think about where to store your bag to keep your gear in good condition until the next game.
Where to Store Your Gear
Choose a storage spot that’s cool, dry, and shaded to protect your equipment. Heat and UV rays can weaken synthetic materials, fade colors, and make nets brittle. Avoid garages or sheds without proper ventilation, as these spaces can expose your gear to humidity and extreme temperature changes.
For long-term storage, keep your netting dry and secure in a sealed container to prevent damage from rodents or insects. Plastic bins with tight-fitting lids are a great option, and you can toss in a few silica gel packets to control moisture. Steer clear of places with drastic temperature swings - like attics or car trunks - or damp areas like poorly ventilated basements. If your gear will be stored for an extended off-season, check on it every few months to catch any issues before they become bigger problems.
Kickit Soccer Tennis Sets: Care Tips

Kickit’s soccer tennis sets are built with convenience in mind, making post-game cleanup a straightforward process. Thanks to their thoughtful design, you’ll spend less time tidying up and more time enjoying your game. These features align perfectly with the cleaning and storage steps outlined below.
Kickit's Easy-Care Design
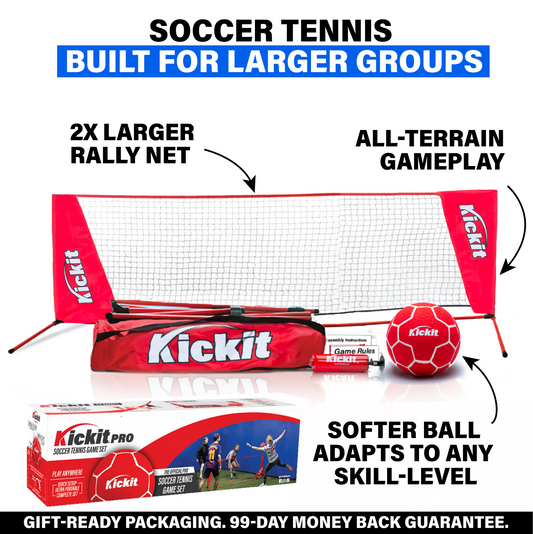
Kickit soccer tennis sets are lightweight, which makes them super easy to handle and clean. Unlike bulkier alternatives, you can move the net and other components to different areas for cleaning without needing help or risking a sore back. Plus, the quick setup - ready to go in under 60 seconds - means breaking it down for cleaning is just as fast and painless.
The materials used in Kickit sets are designed to work on various surfaces, from grass and sand to concrete. This versatility also makes cleaning easier. The synthetic materials resist stains and don’t soak up moisture like some other options, so dirt and sweat wipe away with minimal effort.
The portable design is another standout feature. Every component fits snugly into the included carrying bag, with each piece having its own designated spot. No more struggling to pack oversized parts into tiny compartments. With this user-friendly design, following the care instructions below will help keep your Kickit set in top shape.
Care Instructions for Kickit Products
Cleaning and drying all equipment thoroughly before storage is key to avoiding dirt buildup, mold, and mildew.
Kickit’s thoughtful design makes maintenance simple. For the net, use a mild detergent and lukewarm water, paying close attention to the mesh’s attachment points and reinforced corners where dirt tends to collect. The mesh design allows water to pass through easily, so rinsing is quick and effective.
Kickit soccer tennis balls are built for all-surface play, but this means scuff marks from hard surfaces are common. Wiping them down regularly will keep them in great condition, and their lightweight design ensures they dry quickly after cleaning.
The carrying bag included with your set also needs occasional care. Follow the care label instructions, and for a thorough clean, turn the bag inside out - especially if you’ve been playing on sandy surfaces.
Store gear in a climate-controlled space to avoid damage from extreme temperatures or humidity.
While Kickit’s synthetic materials are more durable than natural ones, they still benefit from stable storage conditions. Avoid leaving your gear in hot environments, like a car trunk during summer, as high heat can impact the net’s elasticity and the balls’ performance.
Use organized storage systems, such as vertical racks or hooks, to keep gear neat and protected.
Kickit sets are compact and easy to store vertically, whether in a closet or on a garage wall. A simple hook system can keep the carrying bag off the floor, protecting it from moisture and other potential damage.
If you’re storing your set for a long time, such as during the winter, make sure all components are completely dry before packing them away. Periodically check on your gear to ensure it’s ready for action when the next game rolls around.
Conclusion: Keep Your Gear in Top Shape
Key Takeaways
Taking care of your soccer tennis gear is essential if you want it to last and perform well. Simple habits like regular cleaning, thorough drying, and proper storage can make a big difference.
- Clean and inspect regularly: Cleaning your gear helps maintain the ball's shape and the net's strength. Even small steps, like turning your bag inside out, can prevent sand and debris buildup.
- Dry completely: Make sure everything is fully dry before storing it. This prevents mold, mildew, and unpleasant odors - saving you from bigger headaches down the line.
- Store smartly: A climate-controlled area, like a closet or garage, protects your gear from extreme temperatures and humidity, which can ruin synthetic materials. Using hooks or vertical storage keeps items off the floor and reduces moisture exposure.
These straightforward steps not only extend the life of your equipment but also keep it game-ready.
Why Kickit Stands Out
Kickit products are designed with simplicity and durability in mind, making maintenance a breeze.
- User-friendly design: Kickit's soccer tennis sets are lightweight, easy to clean, and built with materials that resist stains and moisture. A quick rinse is usually all you need.
- Convenient setup and storage: With a 60-second setup and a compact carrying bag that has designated spots for each piece, you can avoid the hassle of cramming oversized parts into tight spaces.
Starting at $79.99, Kickit sets are built for long-term use, so you can focus less on upkeep and more on enjoying the game.
FAQs
How often should I clean my soccer tennis gear to keep it in great shape?
To keep your soccer tennis gear in top shape and working like it should, make it a habit to clean everything after each use. This simple step gets rid of dirt, debris, and moisture that can cause damage over time.
Use a damp cloth to wipe down your equipment, and be sure to let it dry completely before storing it. Taking care of your gear not only makes it last longer but also ensures it's always good to go for your next match.
How can I store my soccer tennis gear to avoid mold and bad odors?
To keep your soccer tennis gear fresh and odor-free, ensure everything is completely dry before storing it. Moisture is the main reason mold develops, so always wipe down your equipment and allow it to air dry thoroughly after each use.
When it’s time to store your gear, choose a cool, dry, and well-ventilated spot. Opt for breathable storage bags or vented bins to promote airflow and prevent moisture from building up. Steer clear of humid places like basements or garages, and avoid stacking heavy items on your gear to prevent damage. These simple habits can help preserve your equipment and make it last longer.
Can I clean my soccer tennis gear with household products, or do I need special cleaners?
When it comes to cleaning your soccer tennis gear, you don’t need anything fancy - regular household items like mild dish soap or gentle detergents usually do the trick. To disinfect, you can use a diluted bleach solution or a disinfectant specifically designed for sports gear. Steer clear of harsh chemicals or abrasive cleaners, as these can harm the materials and shorten the life of your equipment.
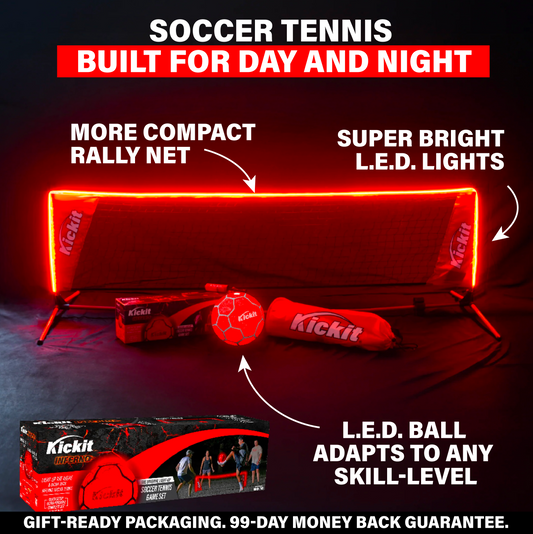
![[NEW] Inferno Kickit](http://kickit.net/cdn/shop/files/LED-Trainer_callouts.png?v=1763481437&width=533)